Infinite Zoom Images: How Narrative Tapestry Learning Works
See how an infinite zoom image turns one picture into a branching visual story. Follow a bee from meadow to pollen grain and wing, step by step.
Imagine looking across a meadow. You notice a bee on a purple flower. You choose the bee, move closer, and discover pollen caught in its branched hairs. From there you can enter one pollen grain or inspect the fine structure of the wing. At every step, the picture itself is the map.
That is the basic idea behind an infinite zoom image. Interakly calls this kind of guided, branching experience a Narrative Tapestry. It turns one image into a connected set of visual worlds. The learner does not read a long page and then look for the thing being described. They select the thing, see it in context, and decide where to look next.
Live interactive example
Explore the bee journey yourself
Select the glass portal, choose a microscopic branch, then use Back to return to the meadow.
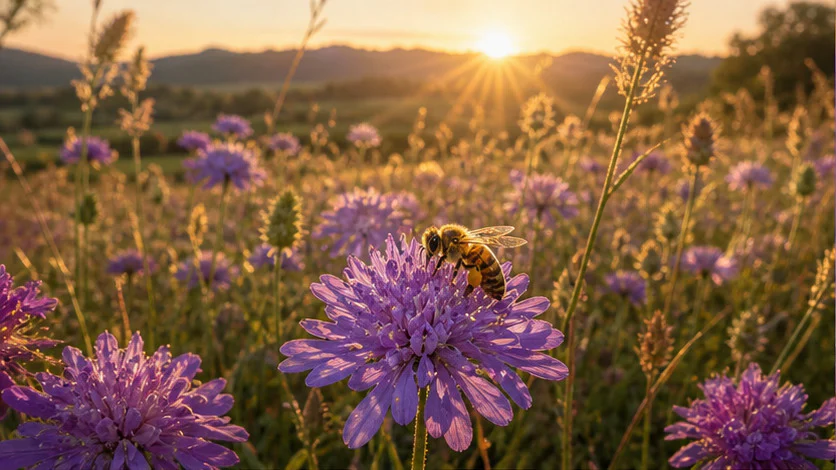
Cover world
The worlds inside a meadow
A quiet marker says where the journey begins without hiding the bee underneath it.
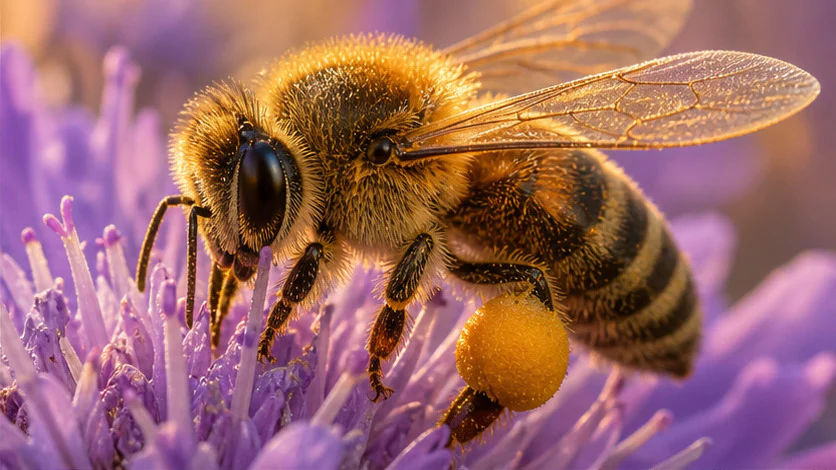
Level 01 · centimeters to millimeters
Meet the pollen courier

Branch A
Read the wing lattice
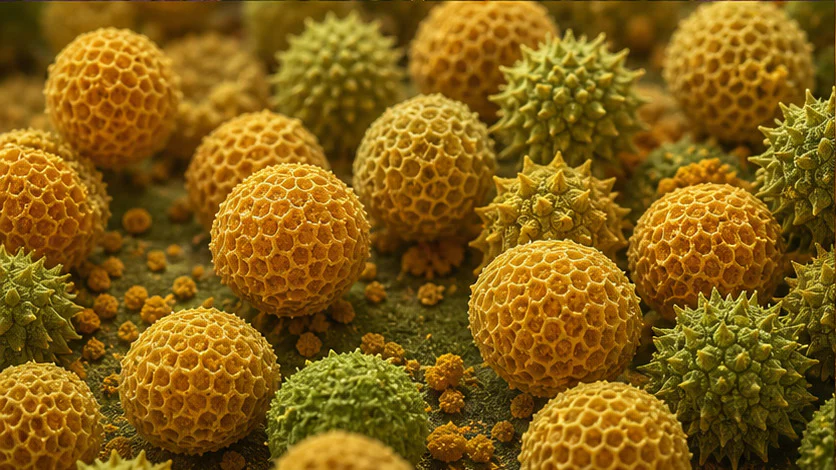
Branch B
Enter one pollen grain
What is an infinite zoom image?
An infinite zoom image is an interactive visual experience that moves from a broad view into deeper levels of detail. The word “infinite” describes the feeling that another meaningful world can exist inside the current one. It does not mean the browser enlarges one photograph forever.
A normal zoom tool makes the same pixels larger. Eventually the image becomes blurry. A Narrative Tapestry uses semantic zoom: the meaning becomes more specific as the learner moves closer. The meadow becomes a bee. The bee becomes a pollen grain or a wing. Each level can use the best image and explanation for that scale.
Ordinary image zoom
The same file gets larger. You can inspect pixels, but the image does not explain what the detail means or lead anywhere new.
Narrative Tapestry
A selected detail becomes a doorway into a new scene, with context, choices, a route back, and a clear learning purpose.
Researchers exploring multiscale museum images have described how zoomable environments can support careful observation and engagement with scientific content. The important part is the design around the image: navigation, annotations, and a reason to explore, not zoom for its own sake. See the Carnegie Mellon team's work on gigapixel image environments.
The bee journey in one minute
See the whole meadow
The cover establishes place and scale. A small transparent portal sits over the bee without hiding it.
Enter the bee
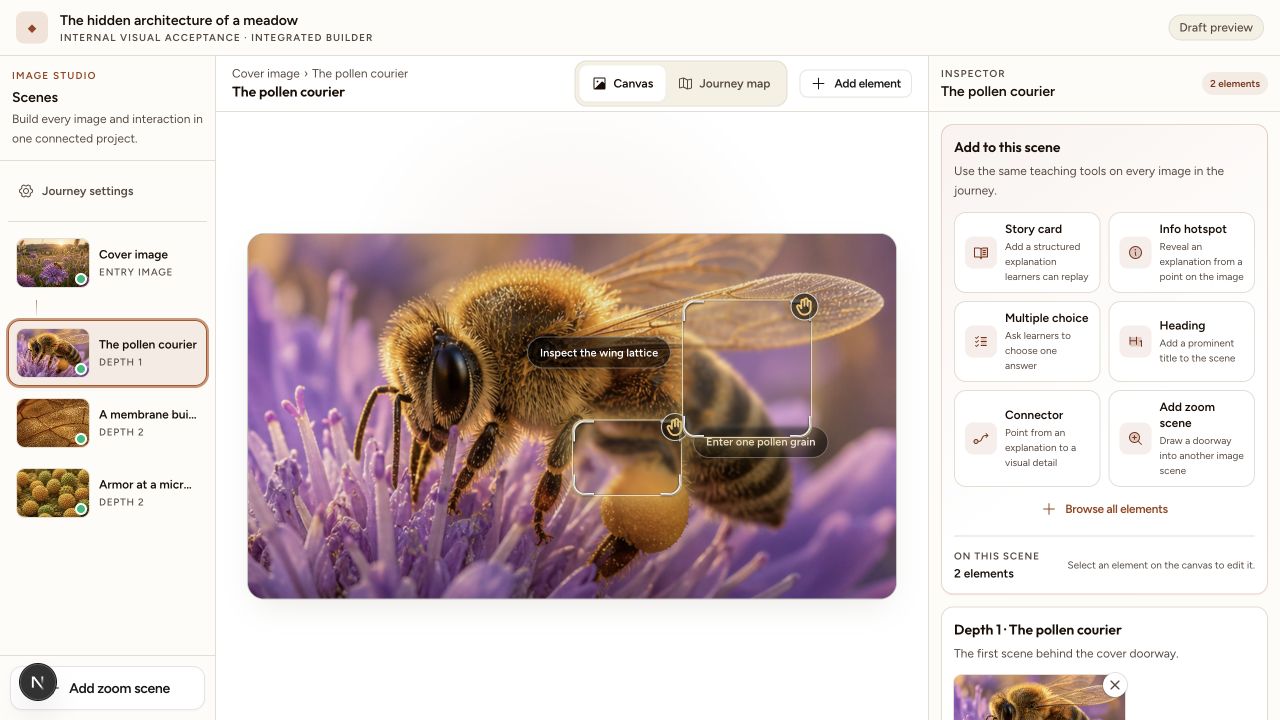
The camera moves toward the selected region and resolves into a detailed macro scene called The pollen courier.
Understand the connection
A short note explains that a bee's branched hairs collect and carry pollen between flowers.
Choose a branch
The learner can inspect the wing lattice or enter one pollen grain. Both choices grow naturally from the bee scene.
Go back and compare
Back returns to the exact parent scene. The learner can revisit the other branch instead of losing access after the first view.
The six parts of a Narrative Tapestry
1. The cover world
The cover is the first image and the learner's home base. It should answer three questions immediately: Where am I? What should I notice? Where can I begin? In the bee example, the meadow provides place, the bee provides focus, and the portal provides the first action.
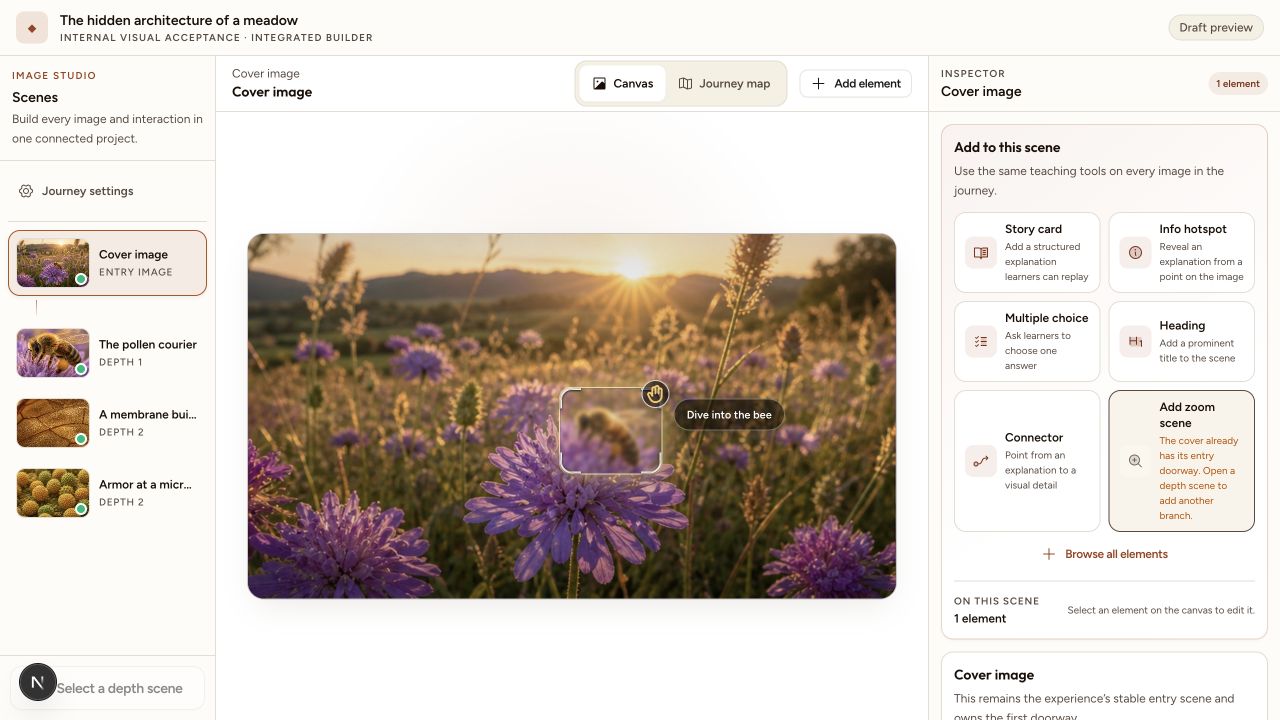
2. The portal
A portal is a clickable region that leads to another scene. It should be visible enough to discover but quiet enough to preserve the image. The glass-style bee portal is partly transparent, so the learner can still see the subject underneath. Its label uses an action such as “Dive into the bee,” not a vague word such as “More.”
3. The scene
A scene is a new visual level with its own image, title, short explanation, scale label, and portals. Each scene should answer one main question. “The pollen courier” explains how the bee carries pollen. It does not try to teach the whole of pollination at once.
4. The knowledge layer
The knowledge layer is the explanation attached to the current scene. Keep it close to the image it describes. Start with the simple idea, then add the exact term. For example: first explain that the outer wall protects a pollen grain, then name that wall the exine.
5. The branch
A branch lets the learner choose between related directions. A useful branch changes the question, not merely the background. The wing branch asks how a light structure survives repeated force. The pollen branch asks how a living cell is protected and recognized.
6. The route home
Every scene needs a clear Back action. At the first detailed scene, Back returns to the cover. Deeper scenes return to their parent. This makes exploration safe: learners know they can follow their curiosity without becoming trapped.
What happens when a learner clicks
A polished transition should help the learner understand the move. The selected region becomes the visual destination. The camera eases toward it, the old scene gives way, and the new scene resolves from the same area. The motion is calm and short. It should feel like moving through the picture, not watching a decorative slideshow effect.
Forward and backward motion have different jobs. Moving forward can use a gentle push into the selected detail. Moving back should feel like returning: the current view recedes and the parent scene reappears. A mirrored “zoom in” effect on Back would give the wrong spatial message.
How the images stay connected
The biggest creative challenge is continuity. The new image must feel like it came from the selected region even when it is a different file. Four kinds of continuity help:
- Subject continuity: the same bee, wing, pollen, room, product, or place remains the focus.
- Visual continuity: light direction, color, texture, and camera angle do not change without a reason.
- Scale continuity: labels such as “centimeters to millimeters” explain how far the learner has moved.
- Idea continuity: each new scene answers a question raised by the parent scene.
In the current manual workflow, the author chooses and uploads the next scene. Use the selected doorway as the continuity brief: the destination should preserve the subject, visual logic, change of scale, and question raised by the parent scene.
How branching works
Think of the journey as a small tree. The cover is the root. Every portal points to one child scene. A child can end the route or contain more portals. Back follows the same tree in reverse. This structure is simple enough for learners to understand without a progress bar.
For education, put the knowledge everyone needs on the trunk. Use branches for different examples, levels of depth, or points of view. For marketing, the trunk can explain the main promise while branches let visitors inspect design, materials, use cases, or proof.
How to plan your own journey
Start with the learning outcome, not the effect. Complete this sentence: “After exploring, a person should be able to…” The bee outcome might be: “Explain how a bee's body, pollen wall, and wing structure support pollination and flight.”
Choose one big-picture image
Use a cover with a clear subject and several details worth entering. A busy image without a focal point makes a weak map.
Write the main question
Decide what the cover should make people wonder. Curiosity needs a direction.
Find the first doorway
Select the exact region that best leads from the overview to the core idea.
Plan two meaningful branches
Give each branch a distinct question. One strong choice is better than five weak ones.
Write one idea per scene
Use a clear title, two or three short sentences, and the exact term learners should remember.
End with synthesis
Ask learners to compare branches, explain the connection, or use what they saw in a new example.
How to build it in Interakly
- Choose Create an interactive image. Upload the cover, or use ordinary image generation for that starting source only.
- Open it in Image Studio. The cover and every later depth use this same editing surface.
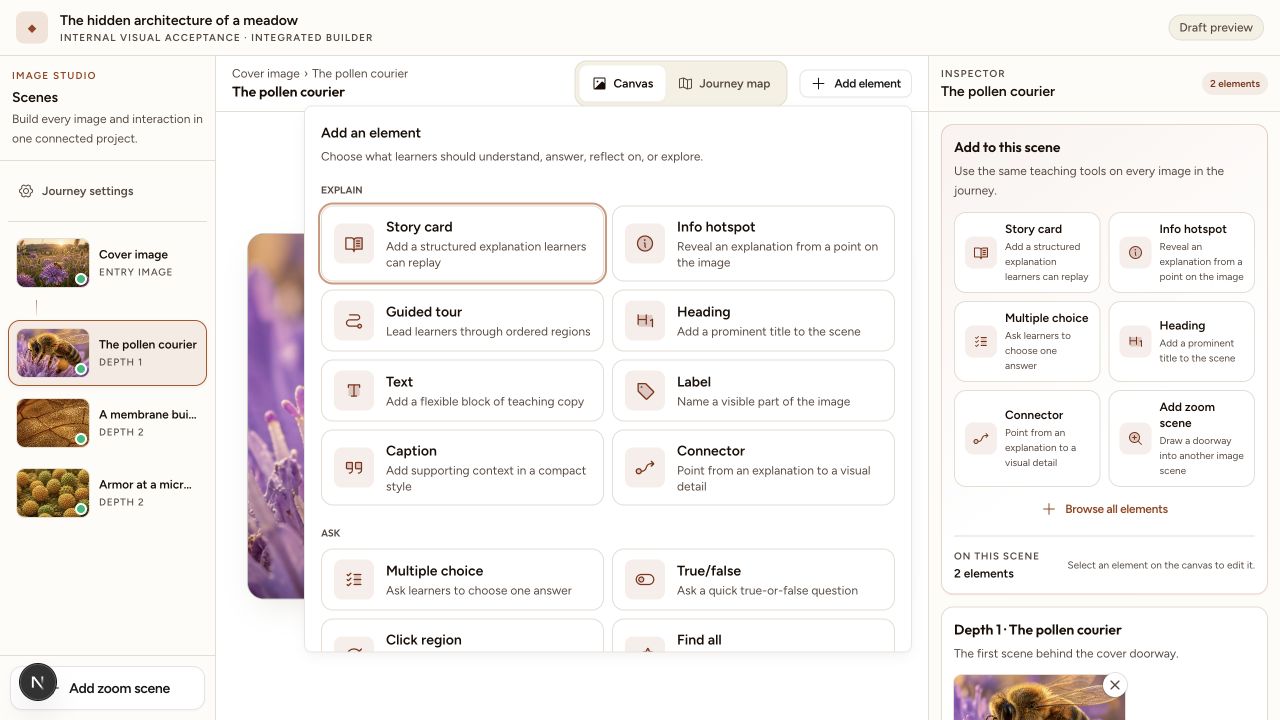
- Open Add element, choose Add zoom scene, and draw a doorway over the exact detail learners will enter.
- Upload the destination image manually. Choose a view that clearly continues the subject and change of scale suggested by the doorway.
- Add the scene title, explanation, scale cue, and alt text. Use the same Add element menu to add story cards, labels, questions, or other teaching elements.
- Add another zoom scene if the route continues. Upload every destination yourself, and use branches only where a real choice exists.
- Preview the complete route forward and backward on desktop and phone.
- Publish, share a learner link, or embed the experience in a website or learning platform that accepts iframe content.
How to make an interactive image
Need the wider editor walkthrough? This step-by-step guide covers uploads, optional starting-image generation, hotspots, questions, preview, publishing, and iframe-compatible embedding.
Design rules that make it feel good
- Keep the marker small. It should point to the detail, not cover it.
- Use action labels. “Inspect the wing” is clearer than “Click here.”
- Keep text short at first. Lead with the main idea and allow deeper reading without blocking the image.
- Use calm transitions. One spatial movement is enough. Avoid particles, spinning, repeated blur, and several effects at once.
- Preserve the authored composition. Images, markers, and labels should scale together across screen sizes.
- Let people revisit. Exploration is not a one-way progress checklist. Learners should be able to return to any scene.
Accessibility and mobile
An image-led lesson still needs a complete non-visual path. Give every image useful alt text. Give every portal a specific accessible name. Make portals reachable by keyboard and large enough to activate by touch, even when the visible glass icon stays small. Keep focus in a logical order and return it to the parent portal after Back.
On a phone, do not rebuild the composition with independently sized markers. Scale the image and its authored elements as one system. Open longer explanations in a readable contained panel, preserve the route home, and test landscape as well as portrait.
Ways to use infinite zoom images
- Science: ecosystem → organism → organ → cell → structure.
- Geography: world → region → city → site → human story.
- History: archive photo → person → object → primary source.
- Art: full work → composition → brushwork → symbol → interpretation.
- Product marketing: product → feature → material → proof → use case.
- Property and travel: destination → building → room → detail → booking reason.
- Technical training: machine → assembly → component → fault → corrective action.
How to know if it worked
Do not judge only by clicks. A click can mean curiosity or confusion. Ask whether people can explain the connection after exploring. Useful signals include:
- Most learners discover the first portal without instructions.
- They can predict what Back will do.
- They explore a branch because its question interests them.
- They can describe how the branch connects to the cover.
- They revisit a scene when answering a later question.
- The experience works with keyboard, touch, and reduced motion.
A simple final prompt can reveal more than a progress bar: “How do the pollen grain and wing solve different problems for the bee?” If a learner can answer in their own words, the journey has become more than an effect.
FAQ
What is an infinite zoom image?
An infinite zoom image is an explorable picture that moves from an overview into one or more detailed visual scenes. A strong version does not simply enlarge the same pixels. It uses authored portals to open meaningful new images, explanations, and branches while keeping the learner oriented.
Is a Narrative Tapestry the same as a zoomable image?
It includes zooming, but adds a learning structure. A Narrative Tapestry has a cover, visible entry points, scene-level explanations, optional choices, a clear route back, and a deliberate ending. It is closer to a visual story than a normal pan-and-zoom viewer.
Do all branches need to be visited?
No. You can let learners choose freely, or make key scenes part of a suggested route. For teaching, put essential knowledge on the main path and use branches for examples, evidence, or optional depth.
Can I make an infinite zoom image with AI?
You can upload the starting source or use ordinary image generation for that first image. AI does not build the connected route or continue a selected crop. Every zoom scene is authored manually in Image Studio: add a zoom scene, draw its doorway over the exact detail, upload the destination image, and repeat at any depth.
Does it work on phones?
Yes. The image, portals, labels, and text scale together so the authored composition stays intact. Text opens in a contained, readable surface rather than covering the whole picture, and learners can always return to earlier scenes.
What subjects work best for this format?
It is especially useful when scale, place, parts, or evidence matter: biology, geography, art, history, product tours, property marketing, museums, technical training, and any story that moves from a big picture to meaningful details.
Why interactive visual learning works
Read the evidence-led companion guide on attention, cognitive load, memory, choice, and the limits of visual interactivity.
Plan the visual learning purpose
Choose the right visual representation and activity before you build a branching journey.
Compare interactive image examples
See when a simple hotspot, region task, guided tour, diagram, or multiscale Tapestry is the better pattern.
Build a visual world people can explore
Upload a strong cover, add the first zoom scene in Image Studio, and build each destination by hand with the same tools at every depth.
Create an interactive image