How to Make an Interactive Image (Step-by-Step)
Learn how to make an interactive image step by step. Upload or generate a picture with AI, place hotspots and questions, let AI Auto-place do the first pass, then preview, publish, and embed it anywhere.
You have a picture that says a lot. A labeled diagram, a map, a photo of a piece of equipment, a screenshot of a dashboard, a famous painting. You put it in front of learners, and most of them glance at it for a second and move on. The detail you cared about goes unnoticed, and you have no real idea what they looked at.
An interactive image fixes that. Instead of a flat picture, learners get markers they can click to explore, questions that ask them to point at the right part, and short explanations that appear exactly where they are looking. In this guide we will turn an ordinary picture into an interactive image, step by step, in about fifteen minutes. No design software, no coding, and nothing for your learners to install.
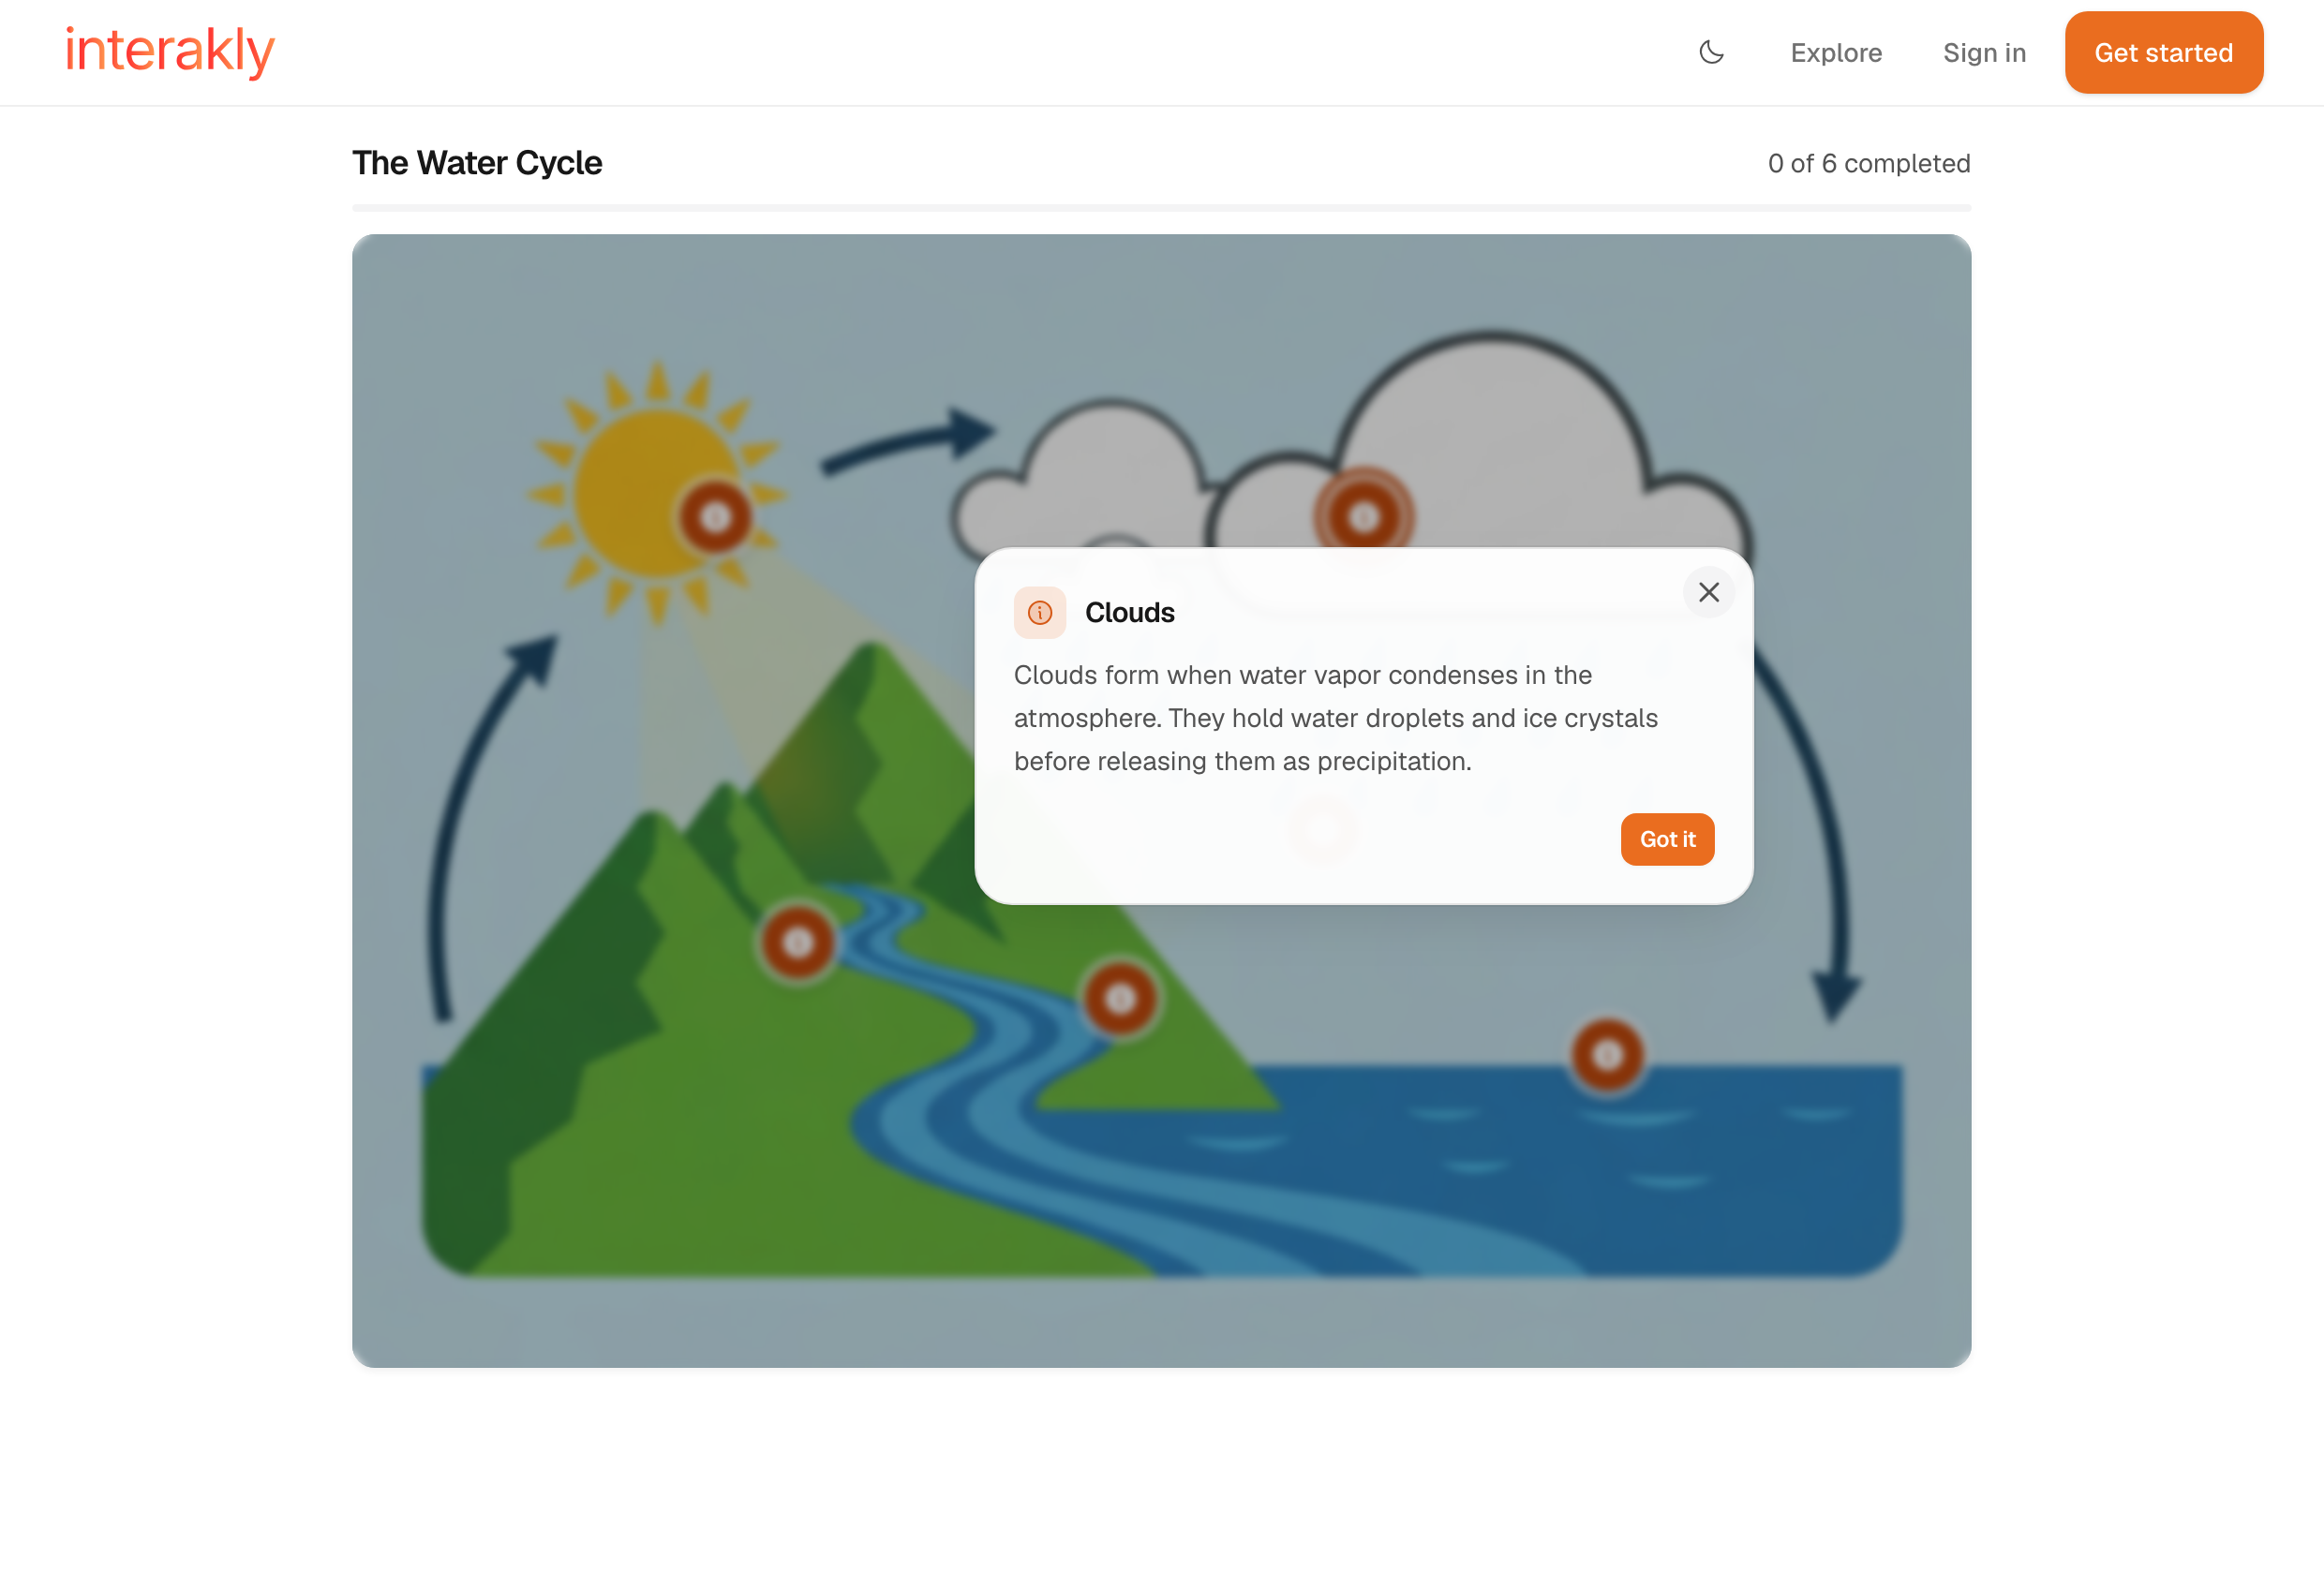
We will start with an image (yours, or one you generate with AI), let AI place a first round of hotspots for you, add activities by hand, preview it the way a learner sees it, then publish and embed it anywhere. Here is what the finished result looks like:
What you need to get started
You need surprisingly little:
- A free Interakly account.
- A picture, or a few words describing one if you want AI to draw it.
- A couple of ideas about what learners should notice.
You do not need photo editing software, a designer, or a single line of code. The one thing that helps most is choosing a picture with clear, distinct parts: a labeled diagram, a photo with several separate objects, a map, or a screenshot of an interface. The more separable the parts, the easier every step that follows becomes.
Step 1: Start with an image
Sign in, open your library, and create a new interactive image. You land on a screen titled Start with an image, marked Step 1 of 2. There are two ways to bring in your picture.
Upload
Drag and drop, paste, or click to upload a PNG, JPG, WebP, or GIF up to 5MB. Best for diagrams, photos, and screenshots you already have.
Generate with AI
Describe what you want and let AI draw it. Pick a style and shape, keep Avoid text on, and generate. You get 10 free images a day.
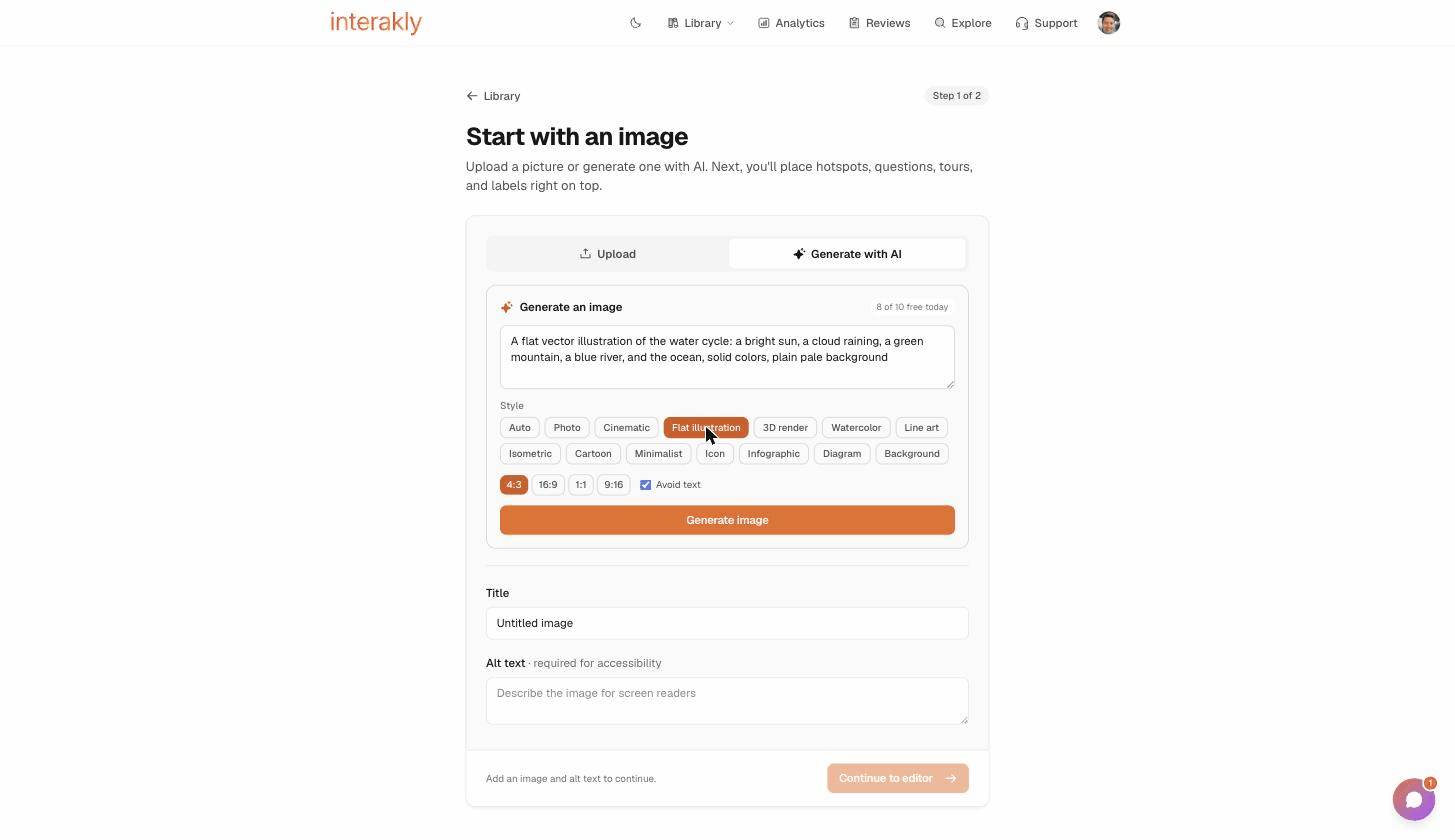
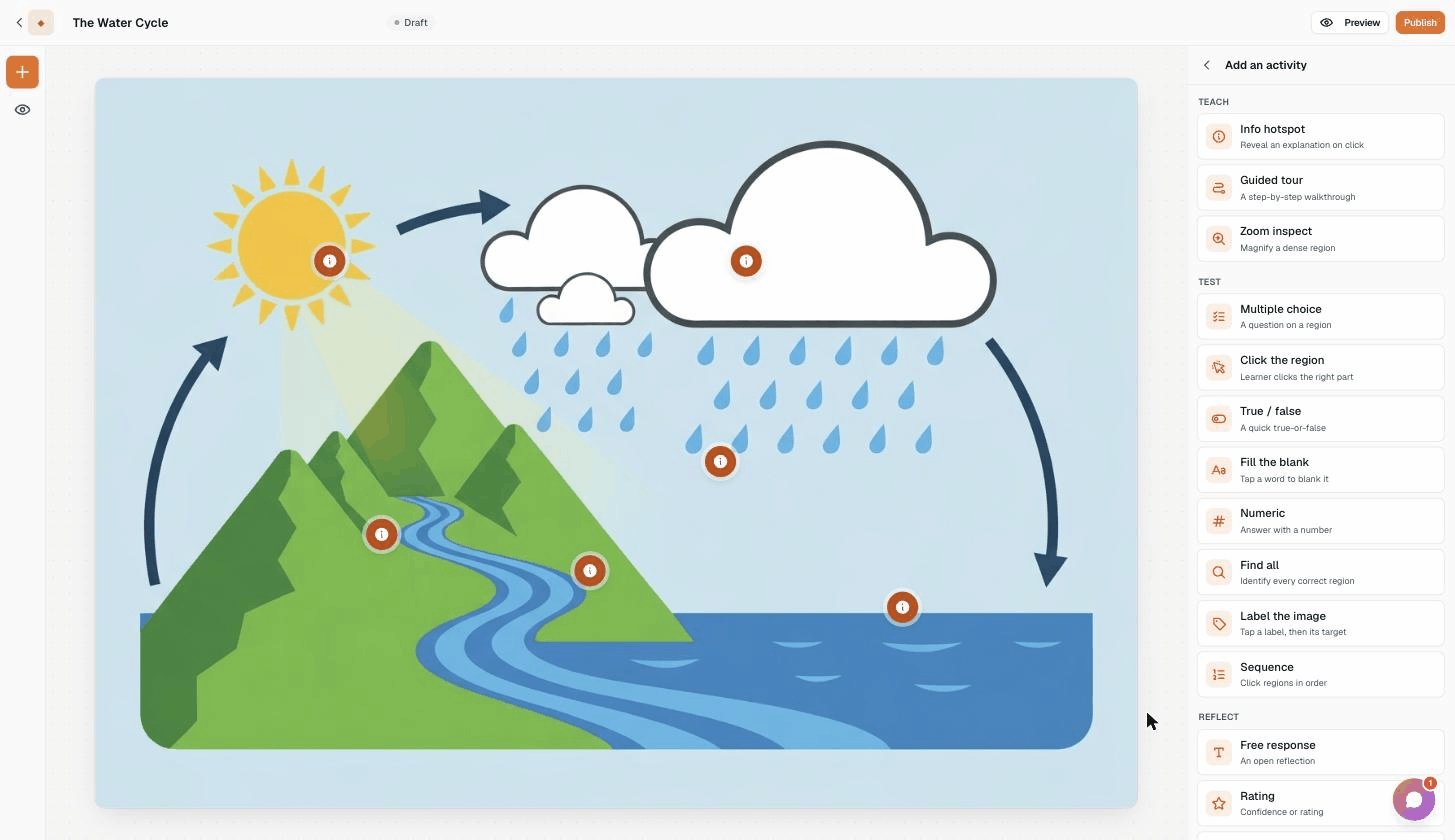
For this guide we generated the picture. We described a flat illustration of the water cycle, chose the Flat illustration style, and kept the 4 by 3 shape. A clean illustration with solid colors works beautifully for interactive images because every part is easy to tell apart.
Two fields sit below the picture. Give it a Title, and write the Alt text, a short description of the image for screen readers. Alt text is required: the Continue button stays inactive until your image, its dimensions, and a bit of alt text are all in place. It is worth writing well, because it doubles as the page description that search engines and link previews use. When everything is ready, click Continue to editor.
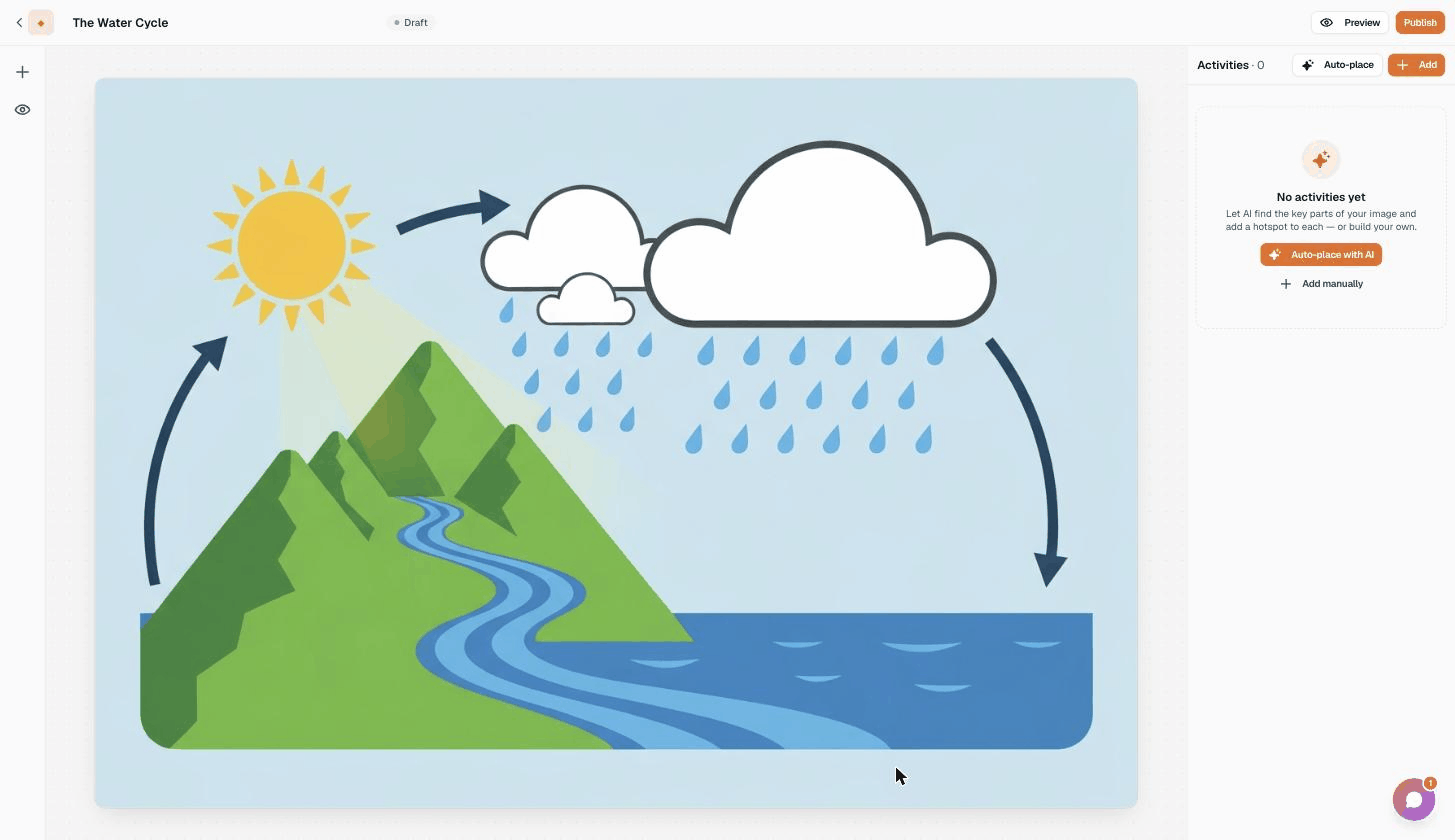
Step 2: Get to know the editor
The editor has three areas. On the left is a slim tool rail with Add activity and Preview. In the middle is your picture on the canvas. On the right is the activities panel, which lists everything you place, with a count, an Auto-place button, and an Add button. Across the top sit your title, a status badge, and the Preview and Publish buttons.
Two things are worth knowing right away. Your work saves automatically as you go; the badge near the title confirms it (Draft, then Draft saved). And the editor is built for a real screen, so use a laptop or desktop rather than a phone when you are authoring.
Step 3: Let AI place hotspots for you
The fastest way to a first draft is to let AI do it. With no activities yet, the panel shows an empty card with an Auto-place with AI button. Click it. AI looks at your picture, finds the parts a learner should explore, and drops an information hotspot on each one, complete with a short title and a sentence or two of explanation.
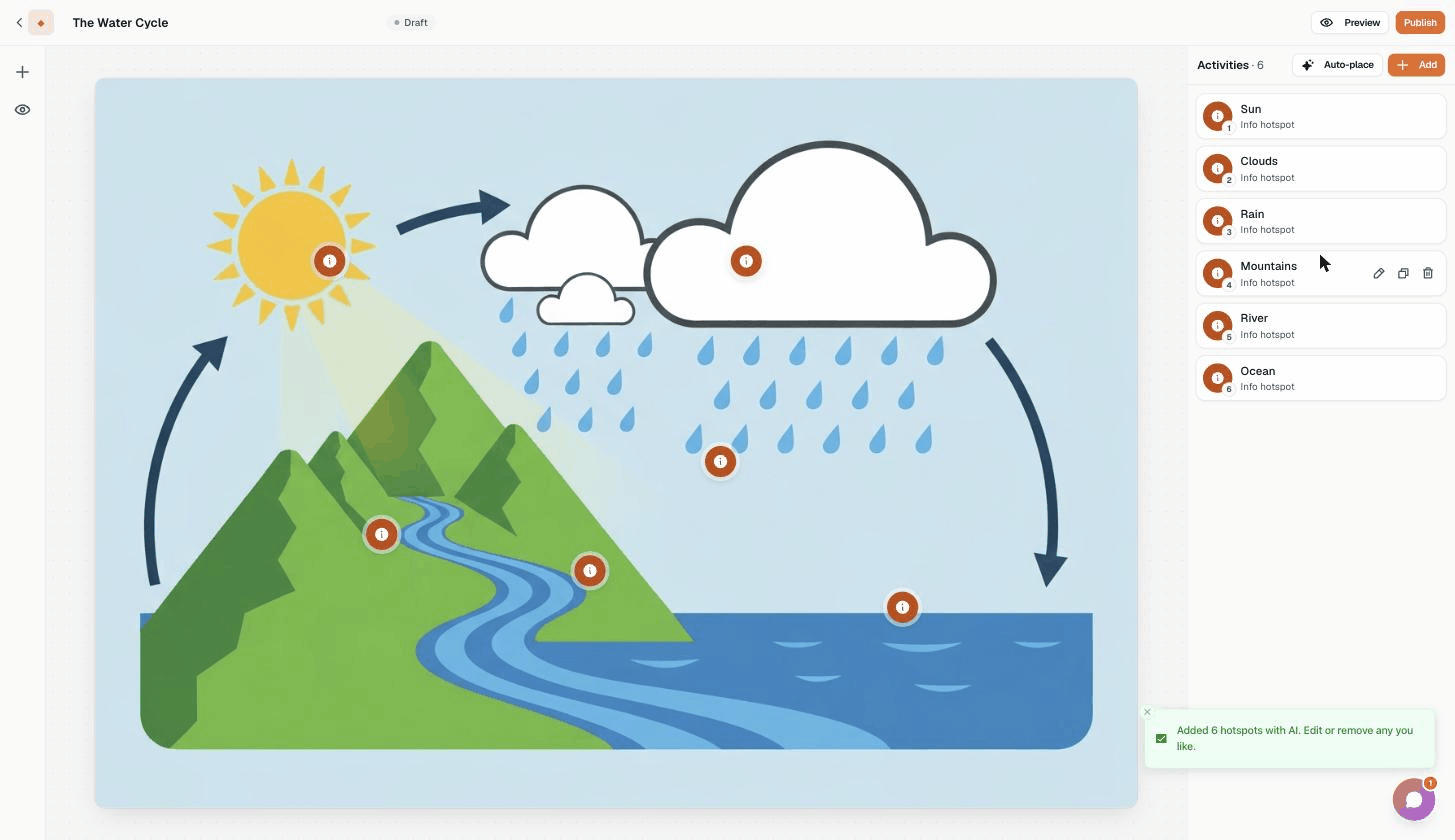
On our water cycle, it added six hotspots in a few seconds: Sun, Clouds, Rain, Mountains, River, and Ocean, each one sitting right on top of the thing it describes. Auto-place adds between three and eight hotspots, depending on the picture.
A few things to keep in mind. Auto-place is free; instead of costing credits, it is simply limited to a handful of runs per hour. The hotspots it creates are a first draft, not a finished product, so rename, reword, move, or delete any of them. And if your picture is abstract, a solid color, or only text, AI may not find clear parts to mark. It will tell you so and invite you to place activities by hand.
Step 4: Place activities by hand
Auto-place gives you hotspots. To add anything else, or to place a hotspot exactly where you want it, build by hand. Click Add (or Add activity in the tool rail) to open the activity picker.
Pick a type and your cursor becomes a crosshair, with a hint that reads Click or drag to place it. Point activities, like an information hotspot or a question pinned to a spot, drop where you click. Region activities, like Click the region, Find all, or Label the image, are drawn as a rectangle, an ellipse, or a freehand shape, so you can outline exactly the area that counts. A connector is drawn from one point to another. If you draw a region that is too small, a hint asks you to draw a bigger one.
Everything keeps autosaving as you place and edit, so you can experiment freely.
Step 5: Choose the right activity type
Interactive images come with seventeen activity types, grouped into four families so the right one is easy to find. You do not need all of them. Most images work well with a handful of hotspots and one or two questions. But it helps to know the full range.
Teach
No answer required. Info hotspot reveals an explanation card. Guided tour walks learners through ordered steps. Zoom inspect magnifies a dense area.
Test
Graded automatically. Multiple choice, True or false, Fill the blank, and Numeric pin a question to a spot. Click the region, Find all, Label the image, and Sequence ask learners to act on the picture itself.
Reflect
Open ended. Free response collects a written answer. Rating and Poll gather confidence or opinion. Compare regions puts two areas side by side for a written comparison.
Decorate
Never interactive. Text adds a styled caption. Connector draws an arrow or line to point at part of the picture.
The spatial types are what make images special. Click the region asks a learner to click the right part of a diagram. Find all asks them to find every correct spot, like every hazard in a workshop photo. Label the image has them match labels to targets. Sequence has them click regions in the correct order, like the stages of a cycle. Grading for all of them happens on our server, never on the learner's device, so scores cannot be faked. Mix a few types so a single picture both teaches and checks understanding.
Step 6: Fill in and style each activity
Select any activity to open its settings on the right. Question types show the same familiar question form used across Interakly, with a Save button that commits your content and points. An information hotspot has fields for a Title, an Explanation, an optional Image (with its own alt text and caption), and an optional Link out to something like a reference page.
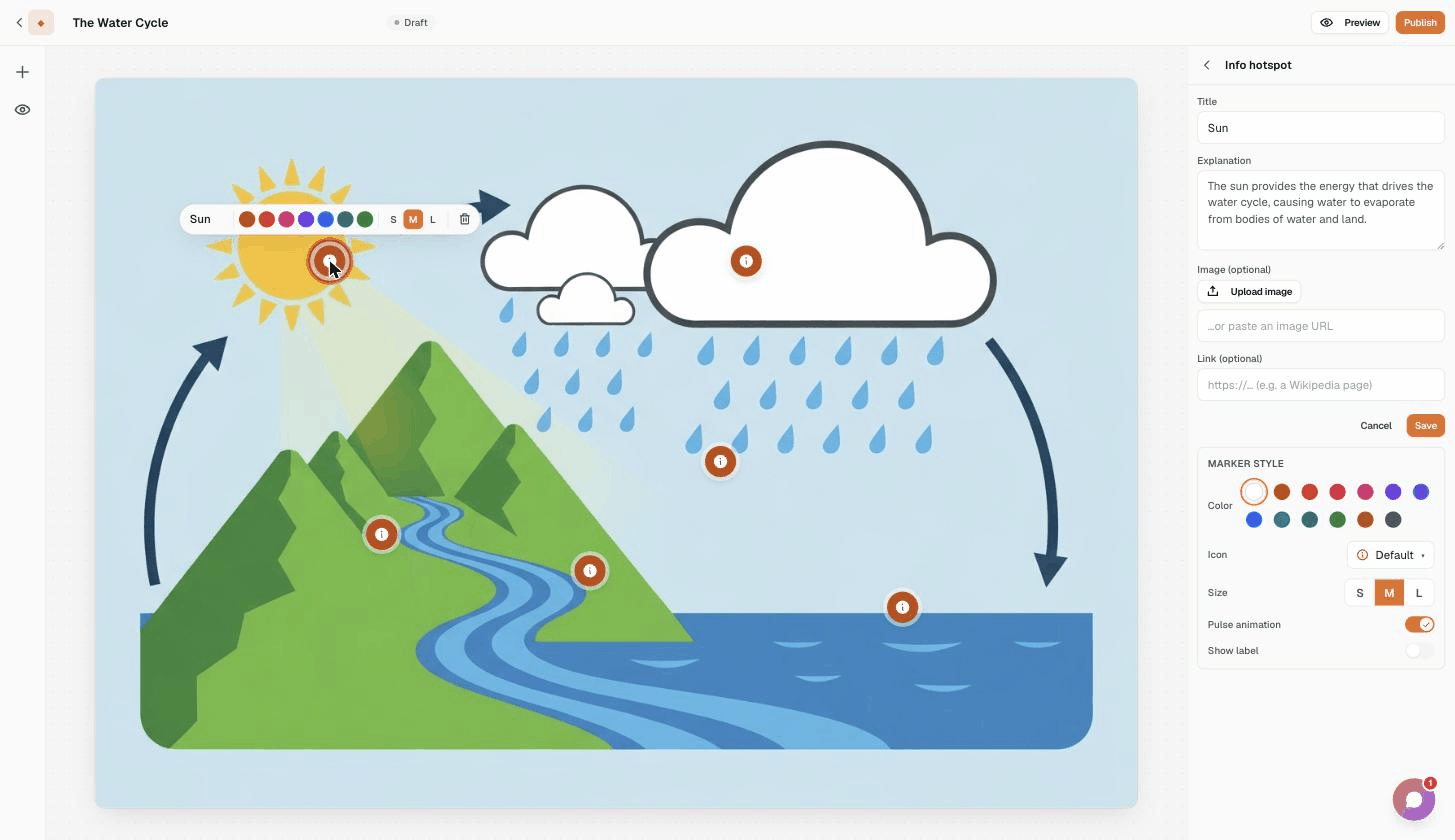
Markers also get a Marker style panel for color, icon, size, a gentle pulse animation, and whether to show a text label. And right next to the selected marker, a floating Quick edit toolbar lets you change the color, size, and title, or delete it without leaving the picture.
If an activity is missing something, a Needs setup badge appears on its row. It is a friendly reminder, not a blocker, so it will not stop you from publishing.
Step 7: Preview as a learner
Click Preview to see your image exactly as a learner will, markers, questions, and all. Nothing is recorded in preview, so click around freely. Use Back to editor to return and adjust.
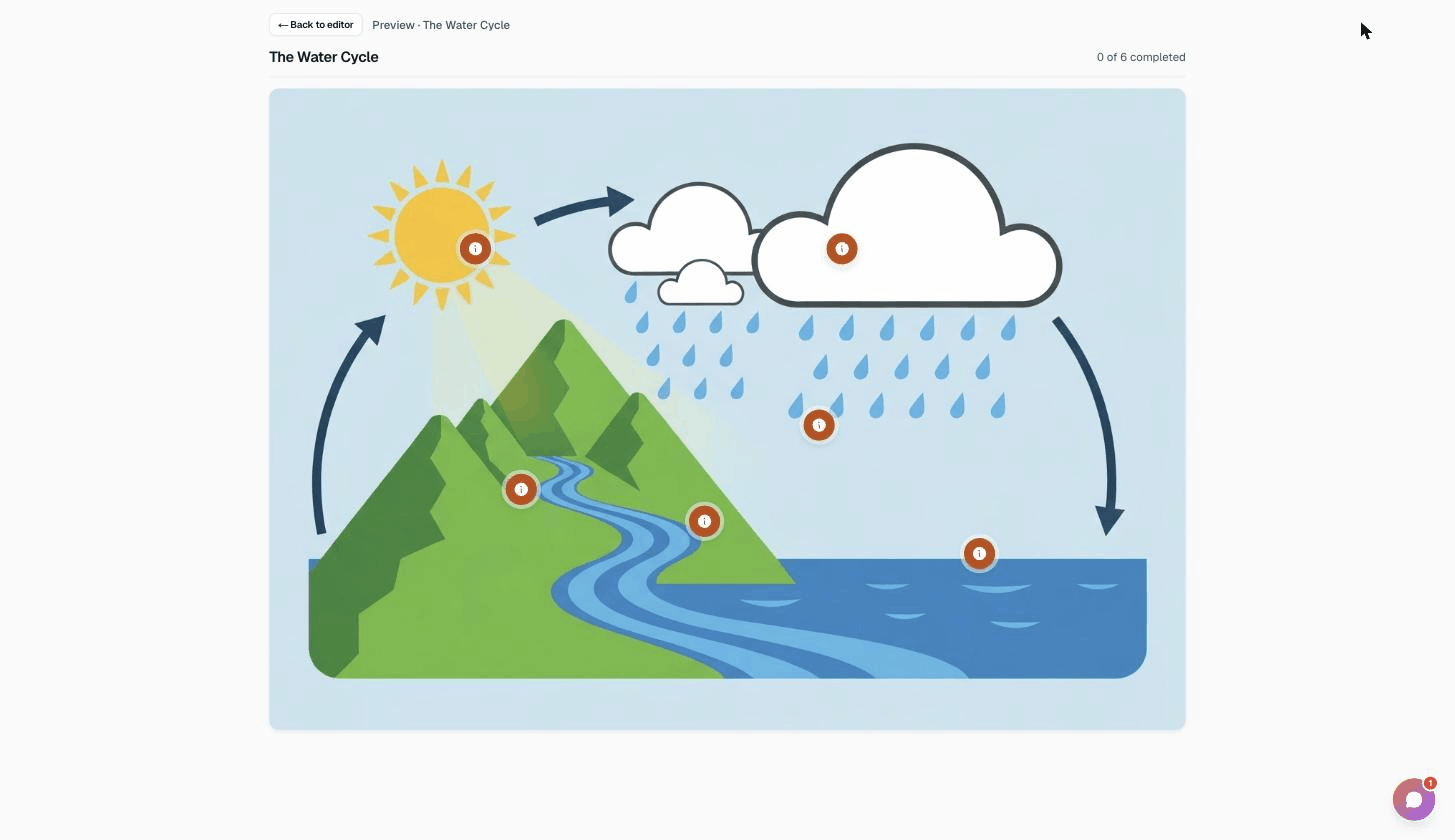
During preview, check that every marker sits on the right part, that questions grade the way you expect, that region tasks accept the clicks you intend, and that every explanation reads clearly. Do at least one full pass and open every activity.
Step 8: Publish your interactive image
When it looks right, click Publish. The status badge turns into a green Published pill, and your image goes live. Any activity you were in the middle of editing is committed first, so a freshly placed one is never lost.
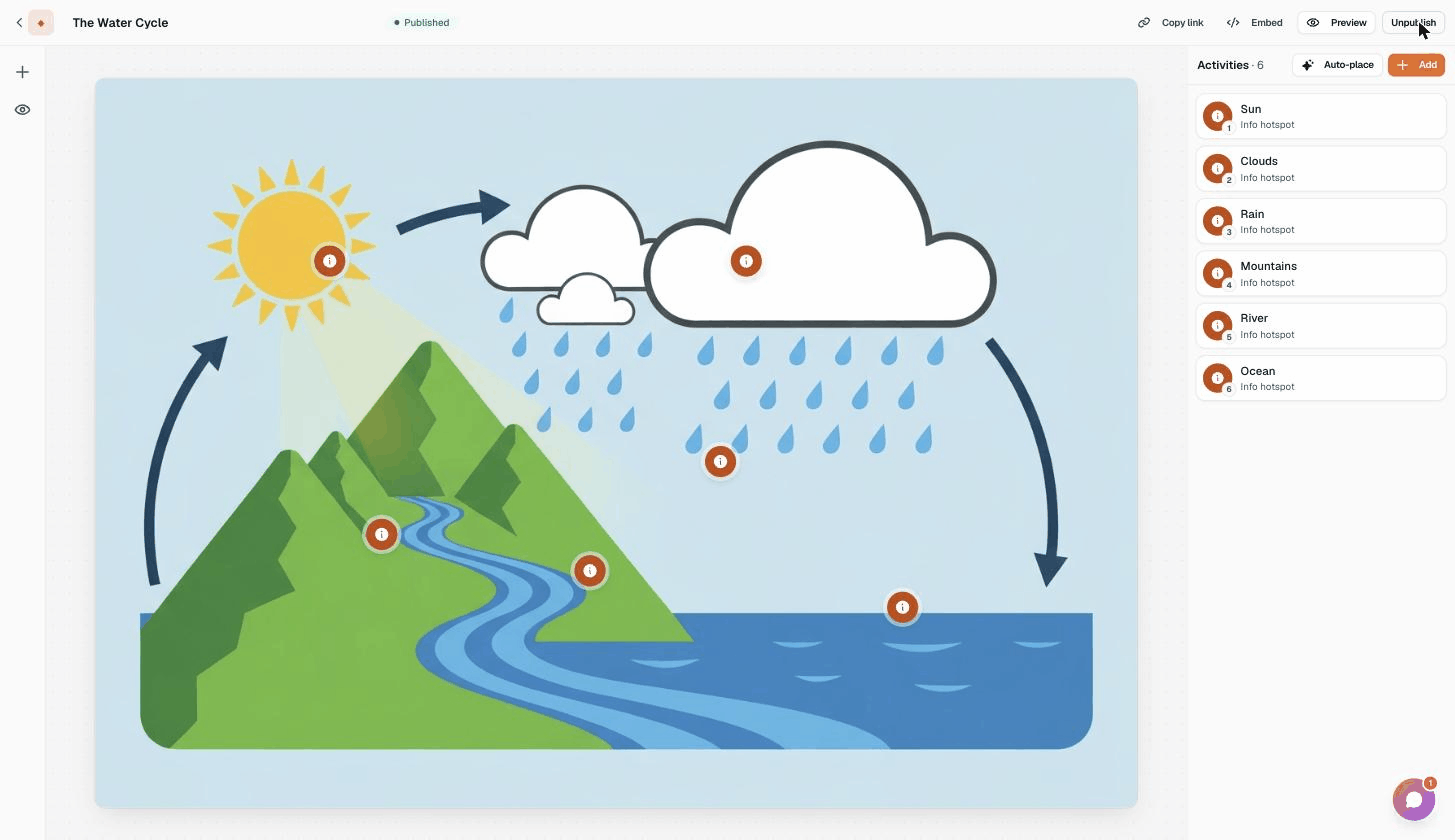
There is no minimum: you can publish with as many or as few activities as you like, and a Needs setup warning will not hold you back. Changed your mind? Unpublish at any time to take it back to a private draft. Once published, the share and embed controls appear in the top bar.
Step 9: Share and embed
There are two ways to get your interactive image in front of learners, and neither one asks them to create an account.
Share a link
Click Copy link to grab a public web address. Anyone you send it to can open and explore the image on any device, with no sign-in. This is the quickest way to hand it out in a message, a document, or a slide.
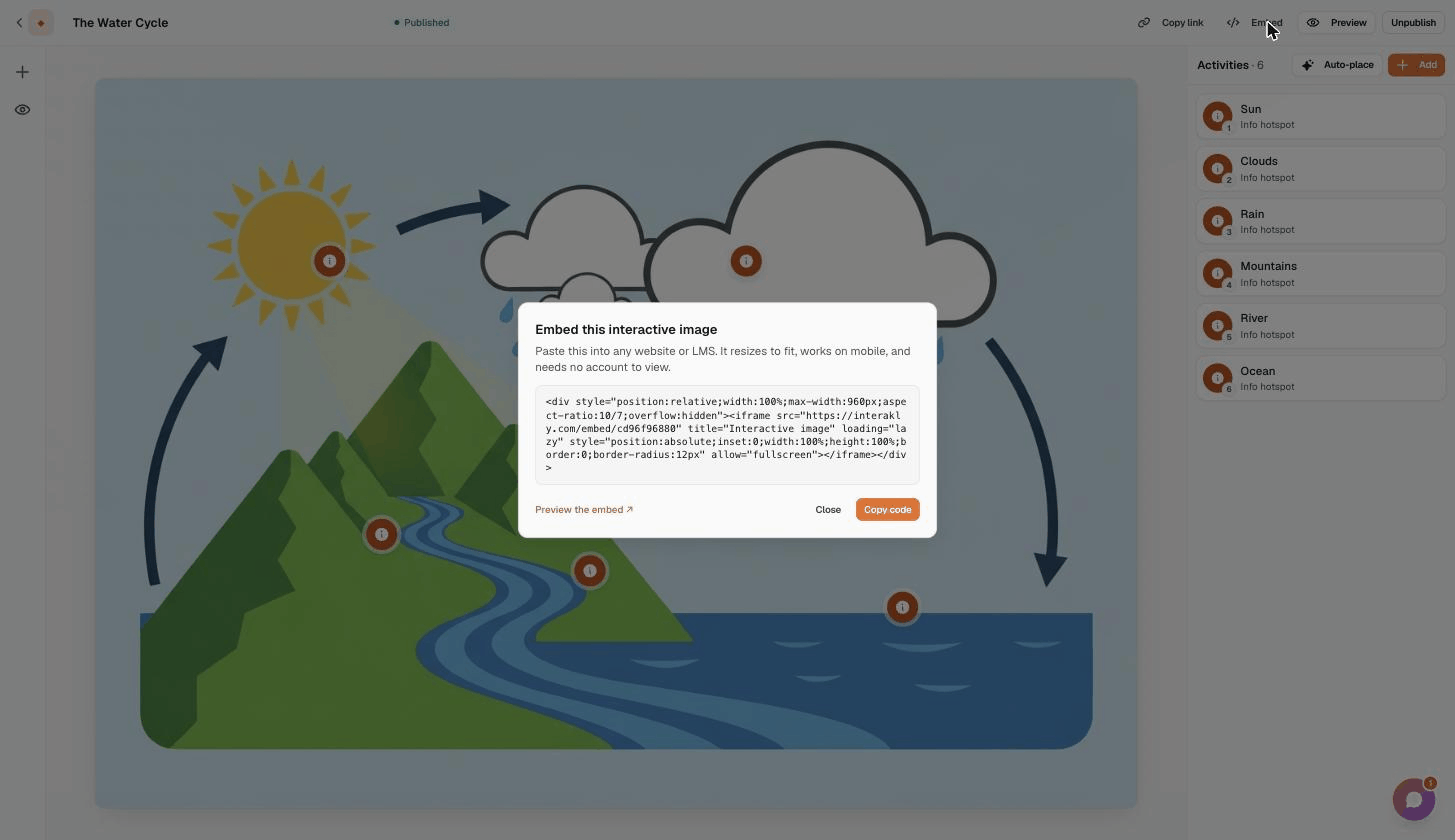
Embed it anywhere
Click Embed to get a snippet you paste into any website or learning platform. It resizes to fit its container, keeps the picture's own shape so it never looks stretched, works on mobile, and needs no account to view.
For most situations the share link is all you need. Reach for the embed when you want the image to live inside an existing page, a course, or a lesson in your LMS.
Common mistakes to avoid
After watching a lot of interactive images get built, the same handful of slips come up again and again. None of them is hard to avoid.
Choosing a busy or low-resolution picture
If the parts of your picture blur together or overlap, both AI and your learners will struggle to tell them apart. Pick an image with clear, distinct regions. A clean illustration often works better than a cluttered photo.
Leaning on Auto-place and never editing it
Auto-place is a brilliant starting point, but its text is generic by design. Spend a few minutes renaming and rewording so the explanations sound like you and match what you actually teach.
Placing markers slightly off target
A hotspot that sits next to the thing it describes, rather than on it, reads as a mistake. Nudge each marker until it clearly belongs to its part, and confirm it in preview.
Grading everything
Not every activity needs a score. Hotspots that simply teach, and reflective prompts that invite thinking, are often more valuable than another graded question. Mix teaching, testing, and reflection.
Skipping the alt text
Alt text is required for a reason. It makes your image usable with a screen reader, and it doubles as the description search engines and link previews show. A vague or empty description wastes both.
Publishing without a full preview
Preview is where you catch the off-target marker, the question with two right answers, and the explanation that reads oddly. Always do one complete pass before you publish.
Frequently asked questions
How long does it take to make an interactive image?
About 10 to 20 minutes for your first one. If you let AI Auto-place do the first pass, you can have a handful of explorable hotspots in seconds, then spend the rest of your time refining the wording and adding a question or two. By your second or third image you will work much faster.
Do my learners need an account to view it?
No. Anyone with the share link can explore the image with no account, on any device, and the same is true of the embedded version. You only need an account to create and edit images yourself.
Is it free to make interactive images?
Yes. You can build interactive images on the free tier, including the activity types and AI Auto-place. Auto-place costs nothing and is simply limited to a handful of runs per hour, and AI image generation gives you 10 free pictures per day.
What is AI Auto-place and should I use it?
Auto-place is a one-click button that has AI look at your picture, find the most important parts, and drop an information hotspot on each one with a short title and explanation. It is the fastest way to get a first draft. Treat the results as a starting point: rename, reword, move, or delete any hotspot, and add your own questions on top.
Can I generate the picture instead of uploading one?
Yes. On the start screen, switch to Generate with AI, describe what you want (for example a flat illustration of the water cycle on a plain background), pick a style and shape, and generate it. You get 10 free images a day, and the picture becomes the base for your activities just like an uploaded one.
Can I put an interactive image on my own website or LMS?
Yes. Once published, click Embed to copy a snippet you paste into any website or learning platform. It resizes to fit its container, keeps the picture's own shape so it never looks stretched, works on mobile, and needs no account to view.
Keep going
How to Create Interactive Video (Step-by-Step)
The same idea for video: place questions and prompts right on the timeline.
What Is Interactive Video?
The bigger picture on turning passive media into active learning.
Interactive Video and Student Engagement
Why clicking, answering, and exploring beats passive watching.
Video Assessment Tools for Teachers
Grade understanding automatically and see who engaged with what.
Ready to make your first interactive image?
Free to start. Generate a picture or upload your own, let AI place the hotspots, and share it anywhere. No credit card, no code.
Get started free